This post may contain affiliate links.
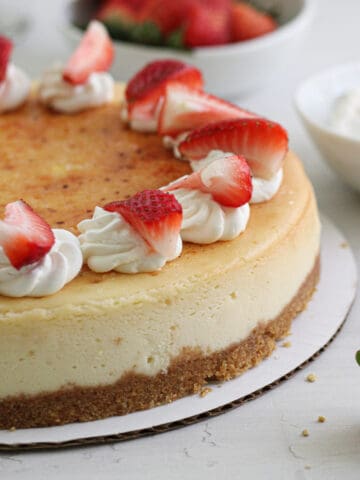
Baking cheesecake is hard, but it's going to get a little bit easier after reading this. You'll be able to answer your cheesecake questions, such as "Why did my cheesecake crack?" and "Do I really need a water bath?", and before you know it, your cheesecakes will be the talk of the town.
Making the Crust and Batter
What speed do I mix the filling on?
Don’t go above medium speed with your mixer, to avoid overmixing and ensure you do not incorporate too much air into the batter. Too much air and an overmixed batter lead to cracks and bubbles on the surface of your cheesecake. Note that a few bubbles are generally unavoidable. However, if more than a few are on the top of your baked cheesecake, you likely overmixed the batter.
I’m feeling adventurous. What can I replace in a recipe if I want to try something new?
Crusts
The easiest swap is with crusts! There are so many different types of crusts that you can do for your cheesecake, besides the traditional graham cracker. Try crushing up Oreos, shortbread, or Nutter Butters and mixing with butter instead of graham crackers. Juniors cheesecake in New York is known for their sponge cake crust (delish).
Batter Additions
Another easy way to customize your cheesecake is by crumbling and adding a candy, cookie, or fruit into the batter right before cooking. To make a gorgeous fruit-swirled cheesecake, puree the fruit you’re interested in. Then swirl directly into the filling that you’ve already poured into your prepared crust.
For full delicious pieces of fruit, candy, or cookies incorporated directly into the batter, chop into bite-size pieces. Then fold into the fully-prepared batter before pouring into the pan.
My New York Cheesecake is a perfect base for these types of customization!
Other Customizations
Swapping out ingredients that are completely incorporated into the filling of the cheesecake is a little more tricky, because the basic ratios behind cheesecake need to be maintained in order to ensure it will still bake the same and will set, without curdling or turning into a gooey mess. However, it can be done!
For example, adding a bunch of eggs of extra eggs to the batter will cause the cheesecake to soufflé (e.g., puff up in the oven, then settle), which can lead to a desirable, light texture if it’s what you’re going for! Check out the Bravetart cookbook for her souffléd cheesecake recipe if this interests you.
For cheesecakes that you want the taste to be fully incorporated into the batter, like pumpkin or raspberry (or whatever else your heart desires), there may be some trial and error involved. Generally, to get the full effect of the additional ingredient, you’ll want to add about ½ cup to 1 cup of the ingredient to the batter. Most of the time, you can use a regular recipe and just add to it. However, with very watery ingredients like fruit juices, you’ll probably want to add 2-3 additional tablespoon of corn starch to your batter as well, to ensure it still firms up in the oven.
Baking the Cheesecake
Do I really need a water bath?
You cannot bake a cheesecake without a water bath.
Ok, so I guess you technically can, but it’s much more likely to overbake and get the dreaded crack on top. So usually, the 30 seconds it takes to do a water bath is worth it. That said, I’ve had plenty of cracked cheesecakes, and they taste just as good. So, if you REALLY don’t want to, you’ll be fine, but I still recommend it.
If you do a water bath, be sure to wrap the outside bottom of the pan with aluminum foil to ensure water doesn’t get into the bottom of your cheesecake!!
I want to check on my cheesecake! Can I open the oven door?
Not unless you want a fallen or cracked cheesecake! Avoid opening the oven door until about 10 minutes before the cheesecake is supposed to be done.
When do I take the cheesecake out of the oven?
Your cheesecake should be pale golden brown around the edges, and set in the middle (it should no longer look wet). Due to oven temperature fluctuations, your cheesecake may get done early, right on time, or need 5-10 minutes extra in the oven. Therefore, start checking for done-ness about 10 minutes before the recipe says it will be done.
What do I do after I take the cheesecake out of the oven?
Take it out and LEAVE IT ALONE! For at least 2 hours, don’t even move it again. Be sure that no significantly cold drafts of air go by it during this time, or it is at risk of sinking.
Then, once fully cooled, it needs to chill in the refrigerator (still in the pan), covered with plastic wrap, for at least 4 hours. Don’t put plastic wrap over the pan until the cheesecake is fully cooled, to avoid condensation.
Once fully cooled, remove from the pan and store the cheesecake.
Storage and Decor
How do I store my cheesecake?
You can bake your cheesecake ahead of time. Just store in the refrigerator for up to 3 days, or in the freezer for about 3 months.
If storing in the refrigerator, cover with press ‘n seal or oiled plastic wrap (use a neutral oil, like canola or vegetable) until ready to serve.
If storing in the freezer, wrap tightly in plastic wrap and store for up to 3 months.
Why did my cheesecake crack (and other common issues)?
Cheesecakes are finicky things. There are multiple things that can go wrong during the baking process. For a full list of everything that can go wrong (and how to fix it), this cookbook will answer all your questions. However, here are a few of the main concerns that I’ve seen while baking.
Why did my cheesecake crack?
- Overbaked: Most commonly, this happens when a cheesecake is overbaked. As described above, the cheesecake should just be set in the middle, and a pale golden brown.
- No water bath: Another common reason this happens is when you do not bake the cheesecake with a water bath, or the water evaporated during the baking process. If you see the water has evaporated, though, DON’T open the oven door! The cheesecake will not bake correctly if it receives the rush of cool air while baking. Instead, keep a good eye on it to ensure you remove it from the oven as soon as the middle is set. Only open the oven door when there’s 10 or fewer minutes left on the timer.
- Undermixed ingredients: Undermixing ingredients can lead to small lumps of cream cheese left in the batter, or not fully dissolved ingredients.
Why did my cheesecake fall in the middle?
- Overmixed: Often, this happens when the batter is overmixed. Overmixing adds in little tiny air bubbles that bubble up to the top and release air during baking, leading to sunken-in cheesecake at the end of the day.
- Underbaked: This can also happen when the cheesecake is underbred (e.g., removed from the oven too early). Sometimes this happens even if baking for the full amount of time specified on the recipe, as oven temperatures vary. Look for the sides to be a light golden brown and the middle to be set (re: not wobbly) before you remove from the oven.
- Cooled too early: Fallen cheesecake sometimes happens if you put the cheesecake in the refrigerator before it is fully cooled.
Why is my cheesecake too soft in the center?
- Underbaked: Underbaked cheesecakes are a little gooey in the center. This can happen if you take it out too early or if your oven temperature is too low. Don’t worry- you can still eat it! Next time, bake it 5-10 minutes longer.
Why don't the sides of my cheesecake look nice?
- Parchment paper: lining the sides with parchment paper leads to easy removal of the cheesecake from the pan, but can lead to less than beautiful sides when the cake compresses. You can try to bake your next one without parchment paper, but usually I keep the parchment paper on and then use a hot knife to smooth the edges.
What questions haven’t I answered? Submit them here!
Try out your newfound cheesecake prowess with these recipes!
Sources
- My personal, many, many tried (and failed!) attempts at cheesecake baking
- Junior’s Cheesecake Cookbook- the ultimate cheesecake recipe book
- Bravetart by Stella Parks